The Medicinal Practice of the Gua Sha Facial Massage
Gua Sha:
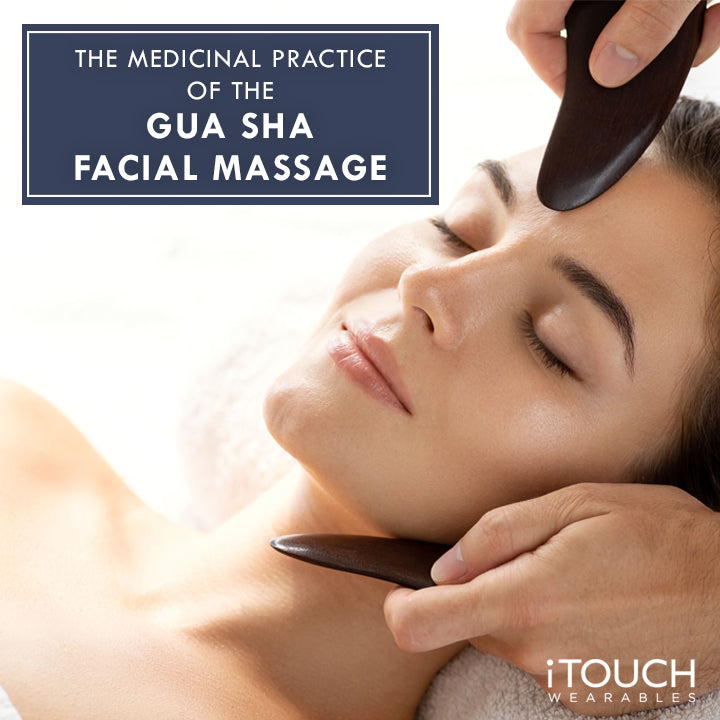
Upon first glance, the word may seem like such a strange and made-up concept. However, Gua Sha (pronounced Gwa Sha) has been seen in Traditional East Asian Medicine for over 2,000 years, being a part of the acupuncture therapy practices seen both clinically and at home. This practice has gained traction and acceptance as an all-natural approach for facial beauty and restoration in the West, with the facial gua sha being one of the latest practice going mainstream in the United States. The actual treatment of gua sha involves scraping or pulling a flat jade or rose quartz stone along the skin. The pulling helps to relieve pain and stiffness and flush out lymphatic fluids from the neck and cheeks. Like acupuncture and cupping, gua sha is another body treatment that can also aid in fixing dryness, alleviating breakouts, and even aging.
What Are The Major Benefits of Gua Sha

Some of the major benefits of Gua Sha include the following:
- Gua Sha Increases Surface Circulation of the Blood : In a study done by the Pacific College of Oriental Medicine, research had found that there was a significant increase of micro-perfusion within the first 7.5 minutes after the use of Gua Sha. Every subject in the study was shown to have a complete or almost full resolution of myalgia pain.
- Gua Sha Contains Anti-inflammatory and Autoimmune Properties : Frequent users of Gua Sha have found that it can reduce the symptoms of a fever and reduce inflammatory symptoms of a chronic illness. A study performed at Harvard had discovered that Gua Sha can increase the production of the enzyme, heme-oxygenase-1 (HO1), which is anti-oxidizing and cytoprotective. The heightened levels of HO1 are also protective against allergic disease and can aid in the regulation of the cell cycle and anti-smooth muscle hyperplasia.
- Gua Sha Has Potential To Be A Treatment to Hepatitis B : In a study conducted at Harvard/Mass General in 2011, it was found that a single Gua Sha treatment in a patient with chronic hepatitis B reduced the levels of a number of different liver enzymes that are affected by the illness. It has been shown to reduce inflammatory injury to the liver as well.
- Facial Gua Sha Can Promote Clearer Skin : According to acupuncturist and owner of Treatment by Lanshin, Sandra Lanshin Chiu, facial Gua Sha is excellent in draining lymphatic fluids, reducing fascia, and breaking down adhesions and hardness within facial muscles and tissue. Chiu as said, “The net effect is a significant boost of blood and qi (chi) to the skin, and an increase in the circulatory flow of blood and fluids."
When performing facial Gua Sha, the main secret is to start at the neck and work your way up to the forehead. This process will act similar to releasing a “funnel”, according to Chiu, in which it will allow fluids to drain out from an increase in circulation in the neck and the jaw. This means that not only will you see a decrease in puffiness in the eyes and more prominent-looking cheekbones, but can see a significant decrease in chronic acne after 8-10 weeks of weekly professional facial gua sha.
How To Perform A Gua Sha Facial

During my first practice with Gua Sha, I will admit that I was a bit skeptical. I had ordered the Jade Gua Sha recommended to me by Sandra Lanshin Chiu, that comes in the shape of a “rabbit”. The stone has two notches that are used to massage the bones, while each flat sides are used for lightly rubbing or scraping the skin. Within my first practice, I had followed a video of Sandra Lanshin Chiu’s, in which she performs the techniques providing step-by-step details of what she is doing. From there, I continued to practice daily with the videos until I felt comfortable performing the techniques by myself without instruction.
PREP
- Before performing a Gua Sha facial, one should start by prepping the skin. Sandra recommends full washing your face first, then applying both a hydration accelerator (hydration mists) and vitality elixir (facial oils) to the face and neck. When applying both the accelerator and elixir, Sandra recommends pressing them into your skin, then gently massaging the face upward to aid in creating lift.
- For those who are new to the Gua Sha Stone itself, Sandra then recommends to get familiar with it and the pressure you will use to treat the skin. One should get comfortable with holding the tool, learning the correct positioning of holding it flat against the skin. From there, one can begin to move the Gua Sha tool against the skin, using a light to medium pressure to guide the stone slowly from the wrist to the upper arm until one has perfected the motion of proper use.
MASSAGE PRACTICE - The Neck
- When beginning the Gua Sha technique, one begins on the neck. Sandra believes that any tension that is in the face starts at the neck. Working first at the back of the neck, take your tool and using the notched edge of the tool, place the notches on the back of neck where it meets the spine. Let the notches sandwich between the spine, slide the flat edge of the Gua Sha tool up the back of the neck until the notches meet the bone near the hairline. Gently massage the bone by wiggling the notches of the tool. Repeat this technique at least five times or more.
- Using the flat edge of the tool, place the Gua Sha on the point where the right shoulder meets the neck, gently slide the tool with light to medium pressure up the neck, stopping where you hit bone (usually by the hairline). Gently wiggle the tool back and forth to massage the bone. You can do this with the curved end of the flat side. Repeat this at least five times or more.
- Repeat the same process on the left side, five or more times.
- Place your hand under the right collarbone, take the long flat edge of your Gua Sha tool and meet the tip of your fingers. Keeping the tool flat against your skin, gently roll over your collarbone, slowly bringing the tool up your neck to meet your jaw bone. Once you hit the jawbone, massage the jawbone with your tool. Do this again five or more times, then repeat on the other side.
- Place your hand on your sternum, where the collarbones meet. Taking the notched edge of the tool, meet the notched edge to your fingers. Lightly glide the tool up the middle of your neck until you reach bone. Massage the chin with the notched edge. Repeat the process again five times or more.
MASSAGE PRACTICE : The Face
Start With One Side of Your Face, Then Repeat The Process On The Other Side
- Place two fingers on the chin. Taking the notched edge of the tool, place each notch on the upper and lower part of your chin, allowing the gap of the tool to fall between the edge of the jawbone. With the tool, laying as flat as possible on the jaw, slowly follow the angle of the jaw all the way to the back. Once you meet your ear, gently massage the bone with your tool. Repeat five or more times.
- Take your finger and place it next to your nose, meeting the nostril. Using the long flat edge of the tool, meet the middle of the tool to your finger. Begin to pull the tool gently across the cheek on a slight angle outwards to meet your ear. When you make contact with your ear, gently massage the bone. You can also take the tool and follow under the cheekbone. This will help get rid of muscle adhesion or tension keep under the cheekbone. Repeat the process again five times or more.
- Moving towards your eye, place your ring finger to the inner corner of your eye. Placing one notch of your tool next to your finger, with extremely light pressure, like the stroke of a feather, glide the tool along your under eye towards the temple bone. The tool should be at a slight angle once you reach the outer corner of the eye. Wiggle the temple bone. Repeat five times or more.
- Place two fingers in between your brow, take the notched edge and meet your fingers. Place one notch on your eyebrow, and begin to glide the notch along the brow bone. Once you reach the end of the brow bone, gently angle the tool and begin to glide the tool towards your temple again. Gently massage and wiggle the bone where it meets the hairline. Repeat five or more times.
- Place three fingers gently on your eyelid. Taking the long flat edge of your tool, place the tool along your fingers. Gently begin to pull upward, rolling over your brow bone. Move up and across your forehead until your reach the hairline. Gently massage the hairline with a wiggle. Repeat five or more times.
- Using two fingers placed where the brows meet, use the short flat edge of the tool and meet your fingers. Begin to pull the tool up towards your forehead, meeting the hairline. Massage the hairline with a wiggle. Repeat five or more times.
Before moving on to the other-side of the face, notice what changes have occurred. You will notice that your brow will be lifted, the eye will be more open. Your cheek and jaw should also be more shaped and lifted. The more times you do the facial, the more results you will see. When you are finished, make sure you wash the tool with soap and hot water. Store the tool in the pouch it was provide with as well for safe keeping.
Share with us whether or not you'll ever try a gua sha massage for yourself by tagging us on Instagram @itouchwearables and Facebook @itouchwearables. Also, be sure to check out our new articles published daily!
-Patrick


%20has%20been%20seen%20in%20Traditional%20East%20Asian%20Medicine%20for%20over%202,000%20years,%20...)